Create and Push a Git Repo to Github in minutes!!
Git is complicated no more!!!
Create your first Github repo
Creating your first repo and pushing files into it can be a huge step in your journey. I found it very hard until recently. Now I will teach you so you don't have to worry about it anymore.
What are we going to do?
- Create a Repo on Github
- Create a PAT
- Push files from your local system to Github
Prerequisites
- Github account
- Git installed and maybe Terminal or something to let you run the commands.
Here are some blogs and articles to help you install.
Git Local Config
To be able to identify who made the changes its good to add your username and emailID to you git configuration.
Run git config --list to see if a username and email id is already configured. If you want to change or add new ones use the following commands
git config --global user.name "Name"
git config --global user.email "email@address.com"
Creating a Github Repository
Repo is a short form for Repository, meaning a collection/group of something. In our case code.
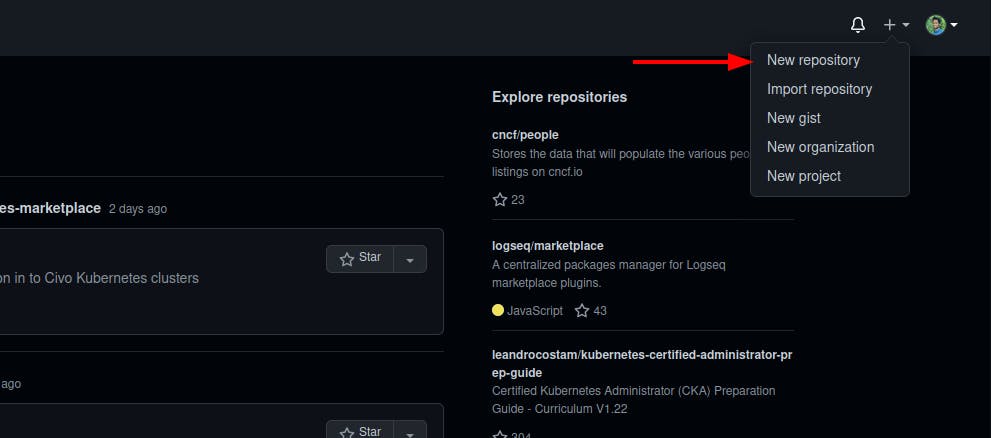
Go to github.com and click on the "+" on the top and click New Repository
You get this page to create a new repo, lets discuss it in detail.
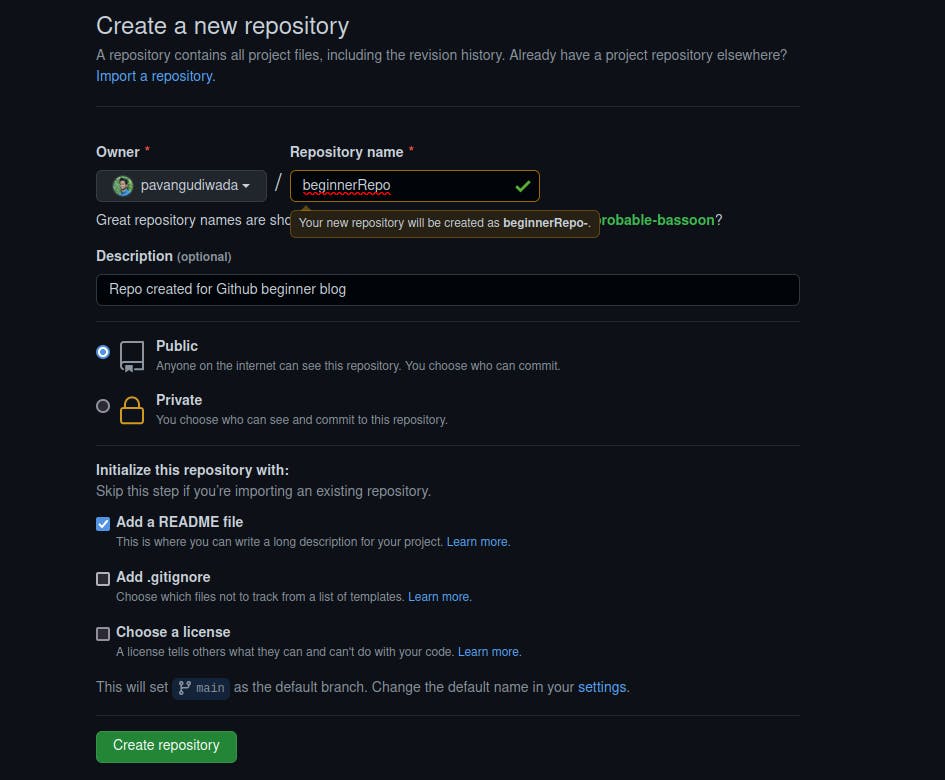
Public/Private - Having a repo as public makes everything you upload including your code, images,etc visible to anyone. Anyone can download it.
README file - This is a Markdown file that you can give a description of your project, installation instructions etc. It's good to have.
.gitignore - Let's say you have a project and there's a file in it that you use to write down some details that you dont want to upload onto Github. You create a .gitignore file and specify its name in it. It wont be pushed into Github.
License - License is very important, not in this case. But choosing the right type of licence lets you decide how anything you publish on this repo can be used.
Click Create Repository to create one.
Now let's download this repo, make changes and push(upload) back to github.
Git Clone
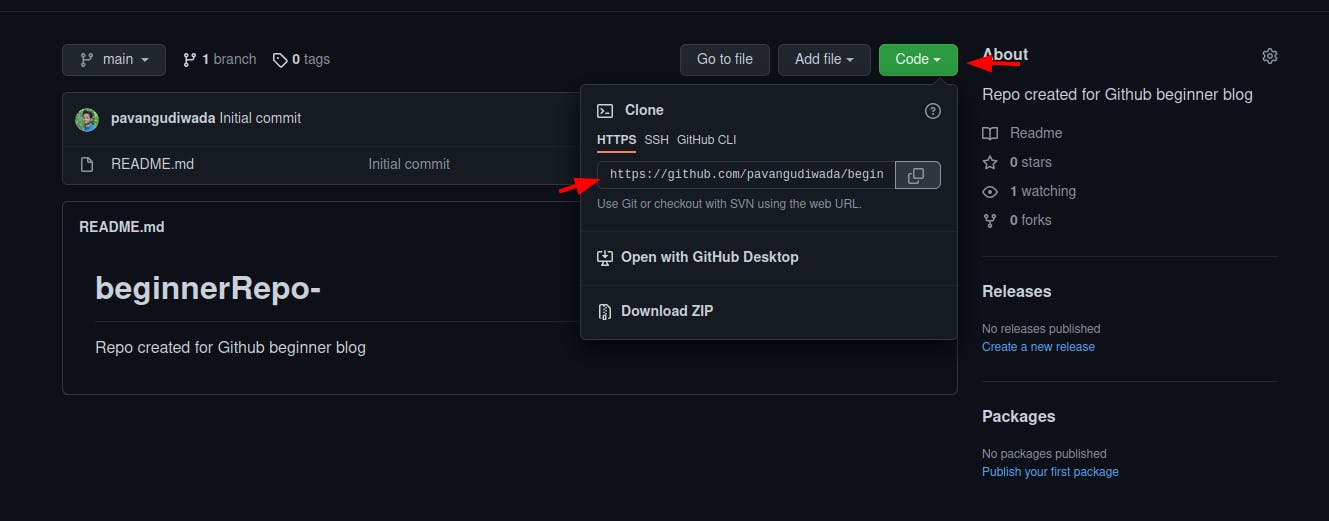
We use git clone URL to download the repo. Get the URL from your Repo
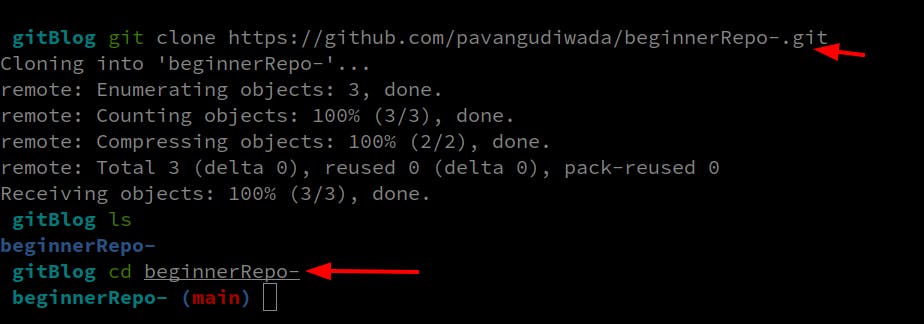
Change the directory into the downloaded Repo.
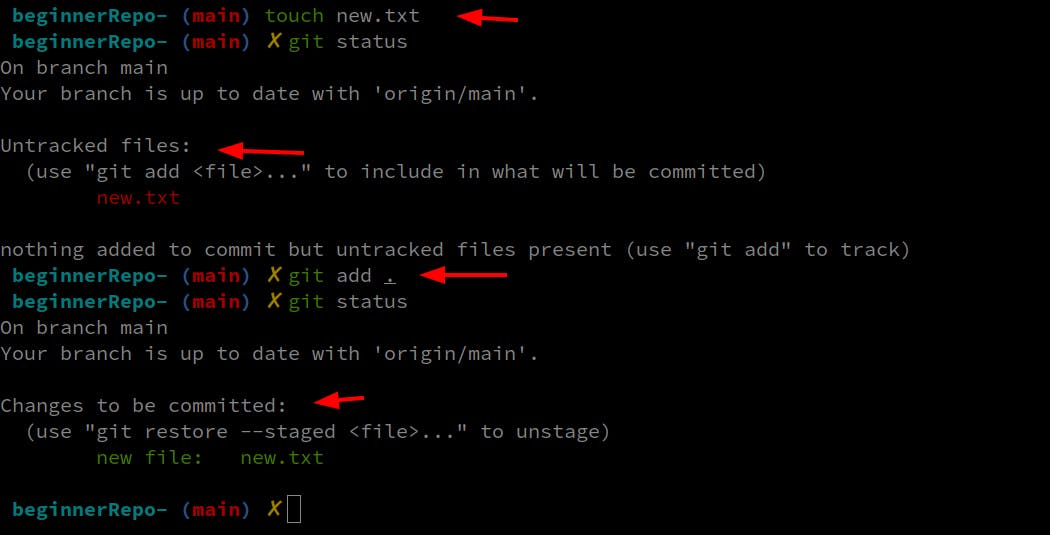
Lets create a new file. Using git status we can see that there are changes that are not tracked by git.
Every time we make changes we have to add them so git can track changes in them later. We do that using git add fileName or you can use git add . meaning everything in this folder.
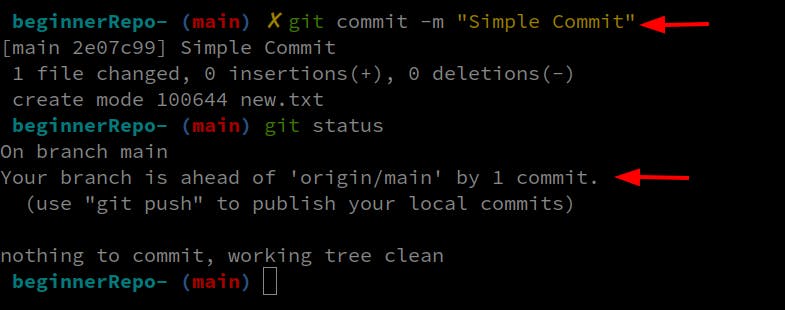
You added the changes but this doesnt mean they are permanent, you should commit the changes to do so. Use git commit -m "CommitMessage" to commit changes.
Now changes are committed locally, its time to push them into your github repo.
Push changes to Github
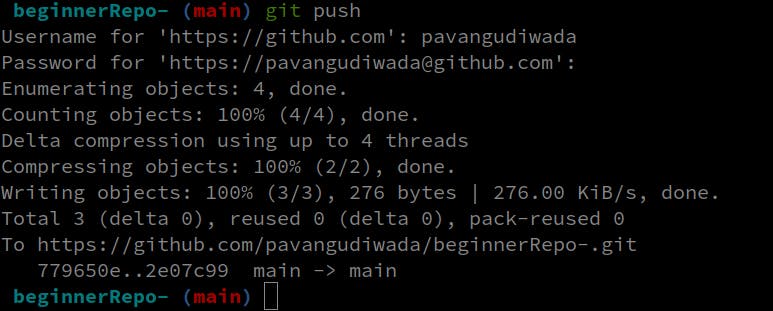
Use git push to push changes into Github. This works if your github account is already configured. If not you will be asked for a username. Go to your Github Profile to find it.

Then you will be asked for Password, now this is the part that messed up with me so bad that I stayed away from Git and Github for years(true story).
This is not your Github Account password, but instead something called a PAT(Personal Access Token). I understand, not your fault, it said password. Let's get you a PAT!
Create PAT
Go to your Github Settings, scroll down to the bottom and click Developer settings then Personal access tokens
Click Generate a new Token, you will be prompted for your password. Then a new page to create your PAT.
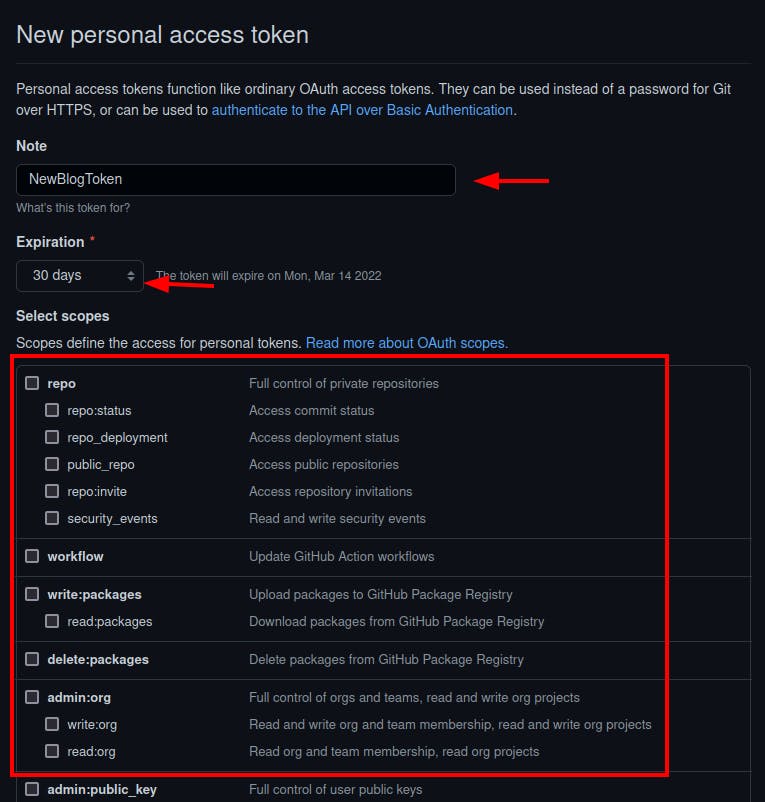
Add a Note so you can remember what the PAT is for.
You can set it to Expire in a day or just have it forever.
Scopes decide what an application with the PAT can do with your account. Choose wisely and click Generate Token.
You will get your PAT. This PAT can be seen only once

This PAT is the password that you should give, once authenticated your code will be pushed onto Github.
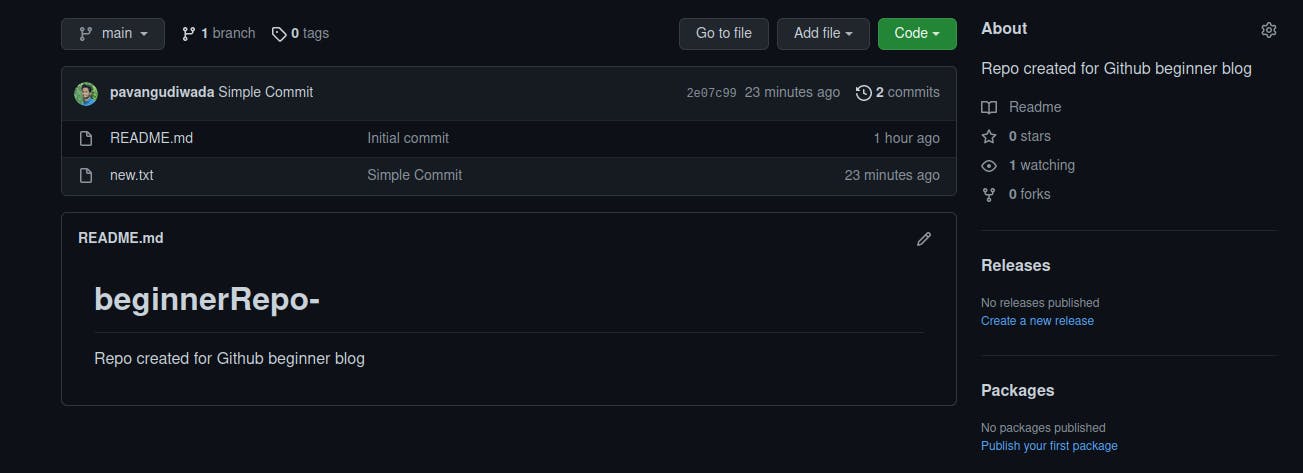
Check your Repo to see the new changes.
What next?
Learn more about Git using Complete Git and GitHub Tutorial by Kunal Kushwaha
Customize your GIthub profile using How to customize your GitHub Profile by Eddie Jaoude
Thank you for reading, you can find me on Twitter, read my blogs on Hashnode and Medium
