WordPress + MySQL = Simple Docker Project
Let's practice Docker together with a simple project
Practicing Docker can be hard, this simple project can help you practice a few Docker concepts. A very little understanding of Docker is needed, its fine even if you don't, all you need is just Docker installed and working.
What will we use?
- Docker
- WordPress
- MySQL
- Docker network
Note: This might seem complicated but it's not, just follow along and give it a try.
Steps:
- We create a MySQL container and then exec into it to create a database.
- Then we create a WordPress container and expose internal port 80 to external 8080.
- WordPress cannot detect the MySQL database so we create a new network and add both the containers to the network.
- We add the database details to the WordPress site and done!
Step 1:
First lets create the MySQL container, if you look at the MySQL docker hub page you will be told that you need a root password to create it. And thats how we know we should give it a environment variable and password.
Use docker run --name wp-backend -e MYSQL_ROOT_PASSWORD=12345 -d mysql:latest
- -e -> environment variables
- -d -> detached mode(runs in the background)
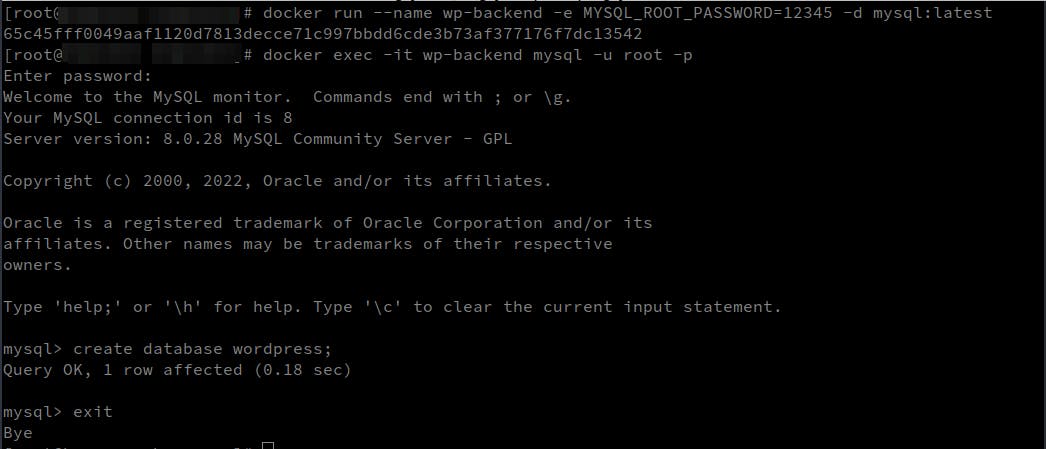
We have the container but we don't have a Database inside it. Wait for a few minutes for the container to be created, then run docker exec -it wp-backend mysql -u root -p
- exec -> Execute a command inside the container
- -it mysql-> using interactive terminal of MySQL
- -u root -p -> The command that you want to run inside the MySQL container
- -u -> username
- -p -> ask for a password(MYSQL_ROOT_PASSWORD)
Once inside, run create database wordpress; to create a database for us to use.
Typeexit to exit the container.
Step 2:
Now that we have the MySQL backend lets create the WordPress frontend of our project.
We can't directly reach the WordPress container, so we open the port 80 inside the container and tell docker to map it to port 8080 of our machine.
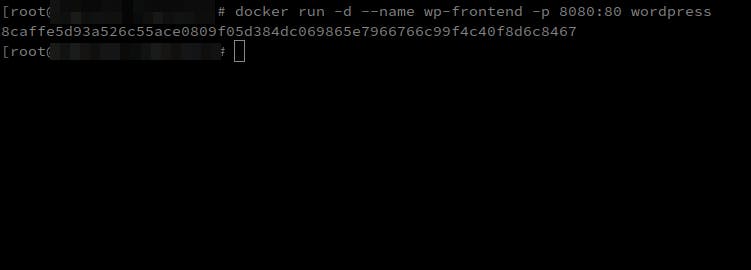
Run docker run -d --name wp-frontend -p 8080:80 wordpress
- -p -> ports
- 8080:80 -> Attach 8080 of host machine to 80 of WordPress container.
If you go to localhost:8080 you should see the WordPress site. Make a few clicks and you will land on the page below.
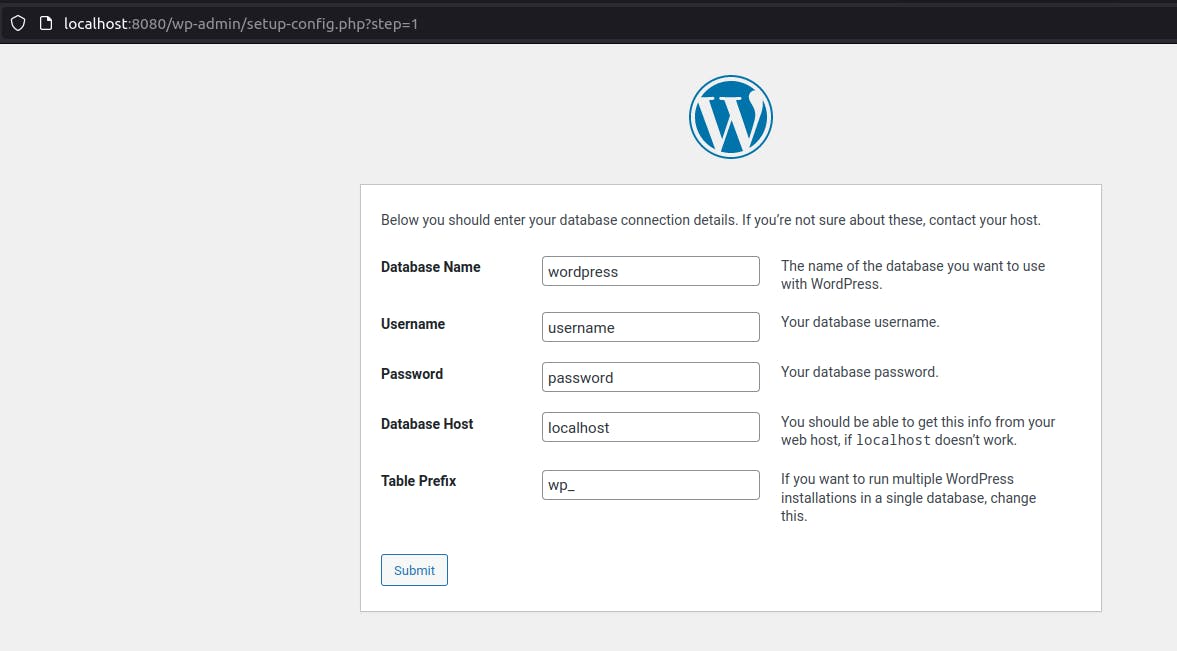
Step 3:
Our wp-frontend(WordPress container) cannot access the wp-backend(MySQL container) so we create a network and add both of them into it. It's like putting them in a same room so they can talk to each other.
Use docker network create --attachable wp-network to create a network
- --attachable -> Lets you add containers manually to this network.
Now we should addboth wp-frontend and wp-backend containers into the wp-network network.
docker network connect wp-network wp-frontend
docker network connect wp-network wp-backend

Step 4:
Now go back to localhost:8080 and add the details
Database Name -> wordpress
Username -> root
Password -> the password you set(MYSQL_ROOT_PASSWORD)
Database Host -> wp-backend
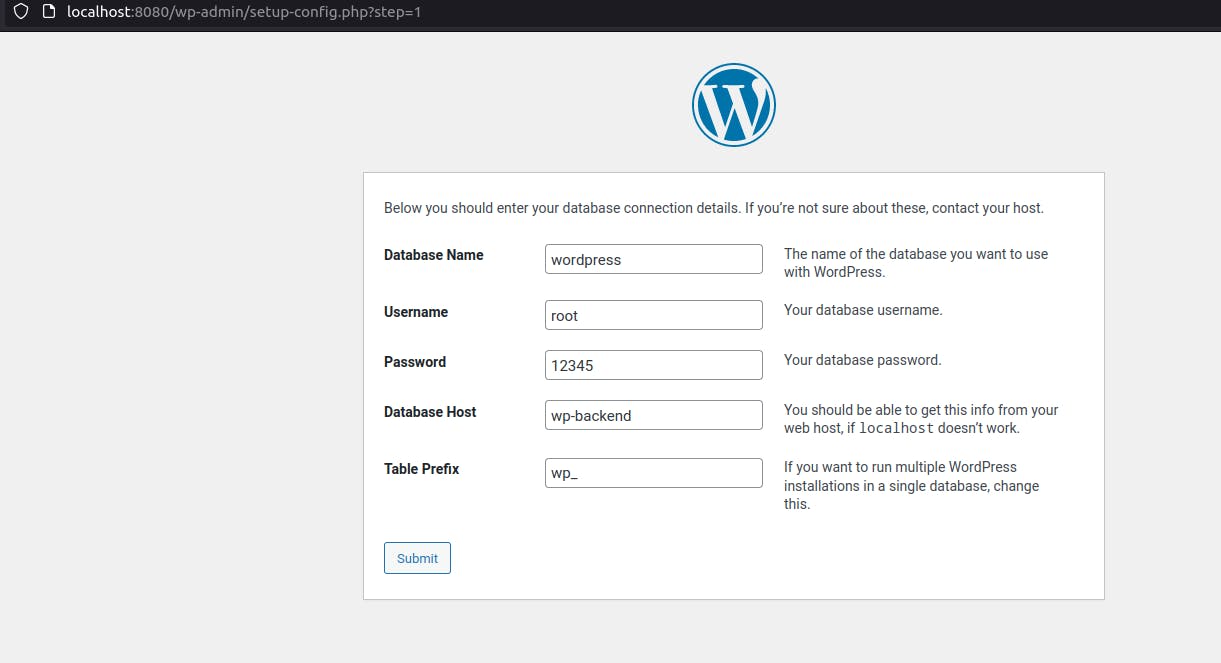
Click Submit, then give in the user details and Install.
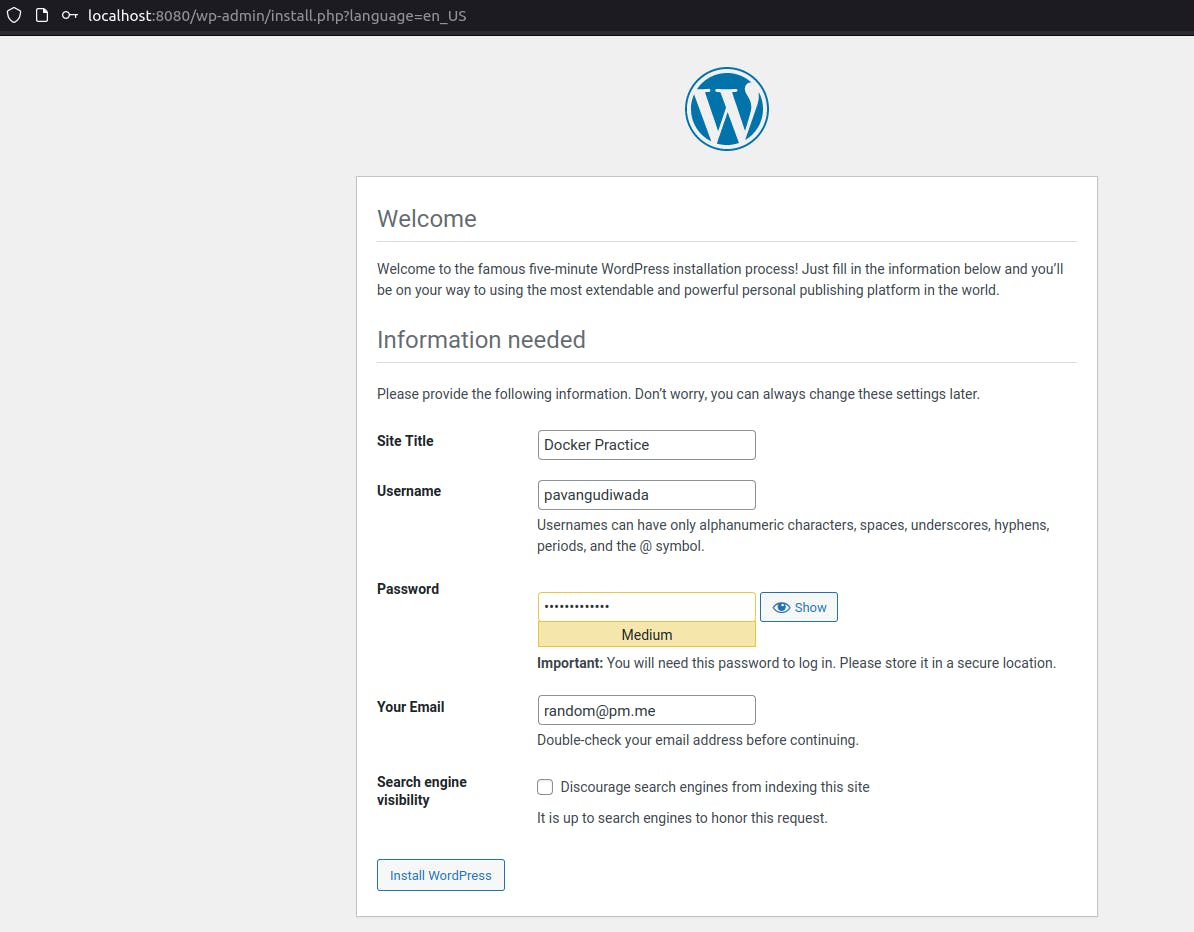
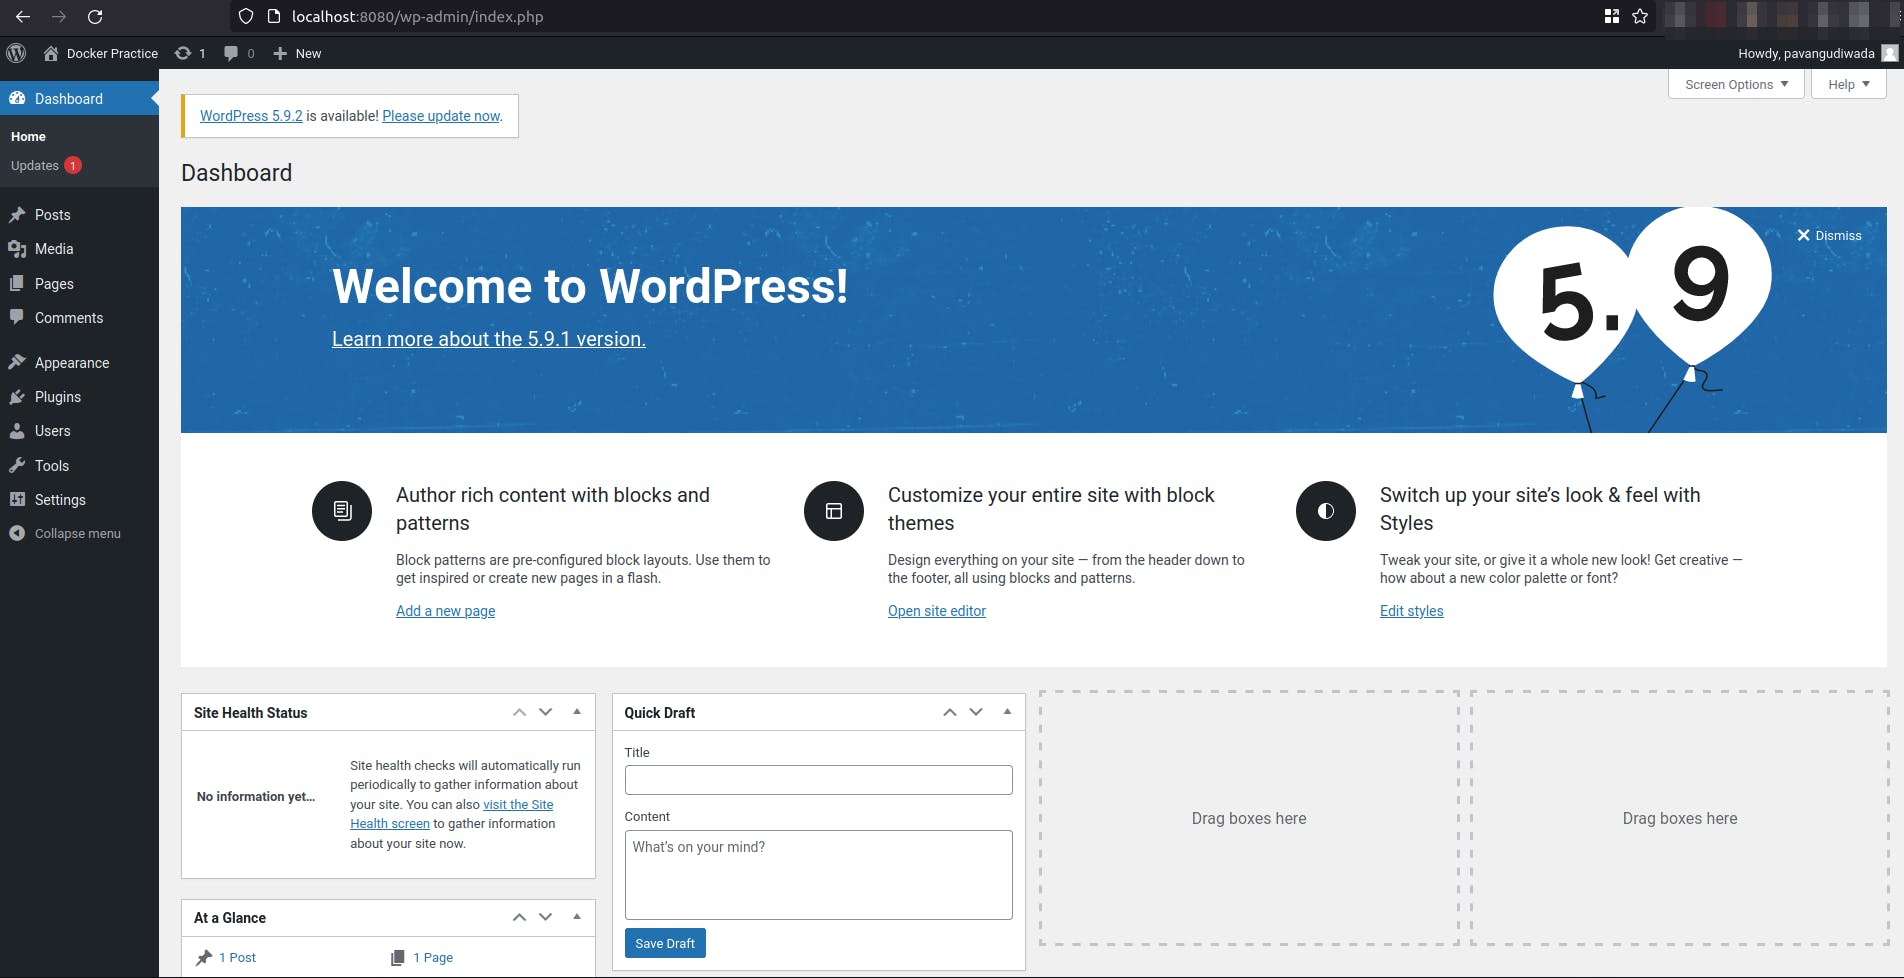
Then login with your details and you will be in your WordPress homepage.
Tips:
Use
docker stop containerIDto stop the container if you are unable to remove it.Then
docker rm ContainerIDto remove the container.You can use
docker rm ContainerID -fto force stop and remove the container.
Resources used:
How to Easily Setup WordPress Using Docker
Thank you for reading, you can find me on Twitter, read my blogs on Hashnode and Medium . Have a great time